
Overview
You can now let your prospects and customers book meetings with you in seconds via Relate Meetings.Getting Started with Relate Meetings
1. Calendar Integration
To use Relate Meetings, it must be integrated with one of the following calendars: Google, Outlook, or Apple Calendar. Only times with no pre-scheduled appointments will be automatically shown, so you can leave meeting slots open without worrying about schedule conflicts. The integration process is as follows:- Go to the workspace name in the top left corner of the screen > Settings (You can also use the shortcut cmd + , or ctrl + , to navigate).
- Click on Meetings > Calendars at the bottom of the left sidebar.
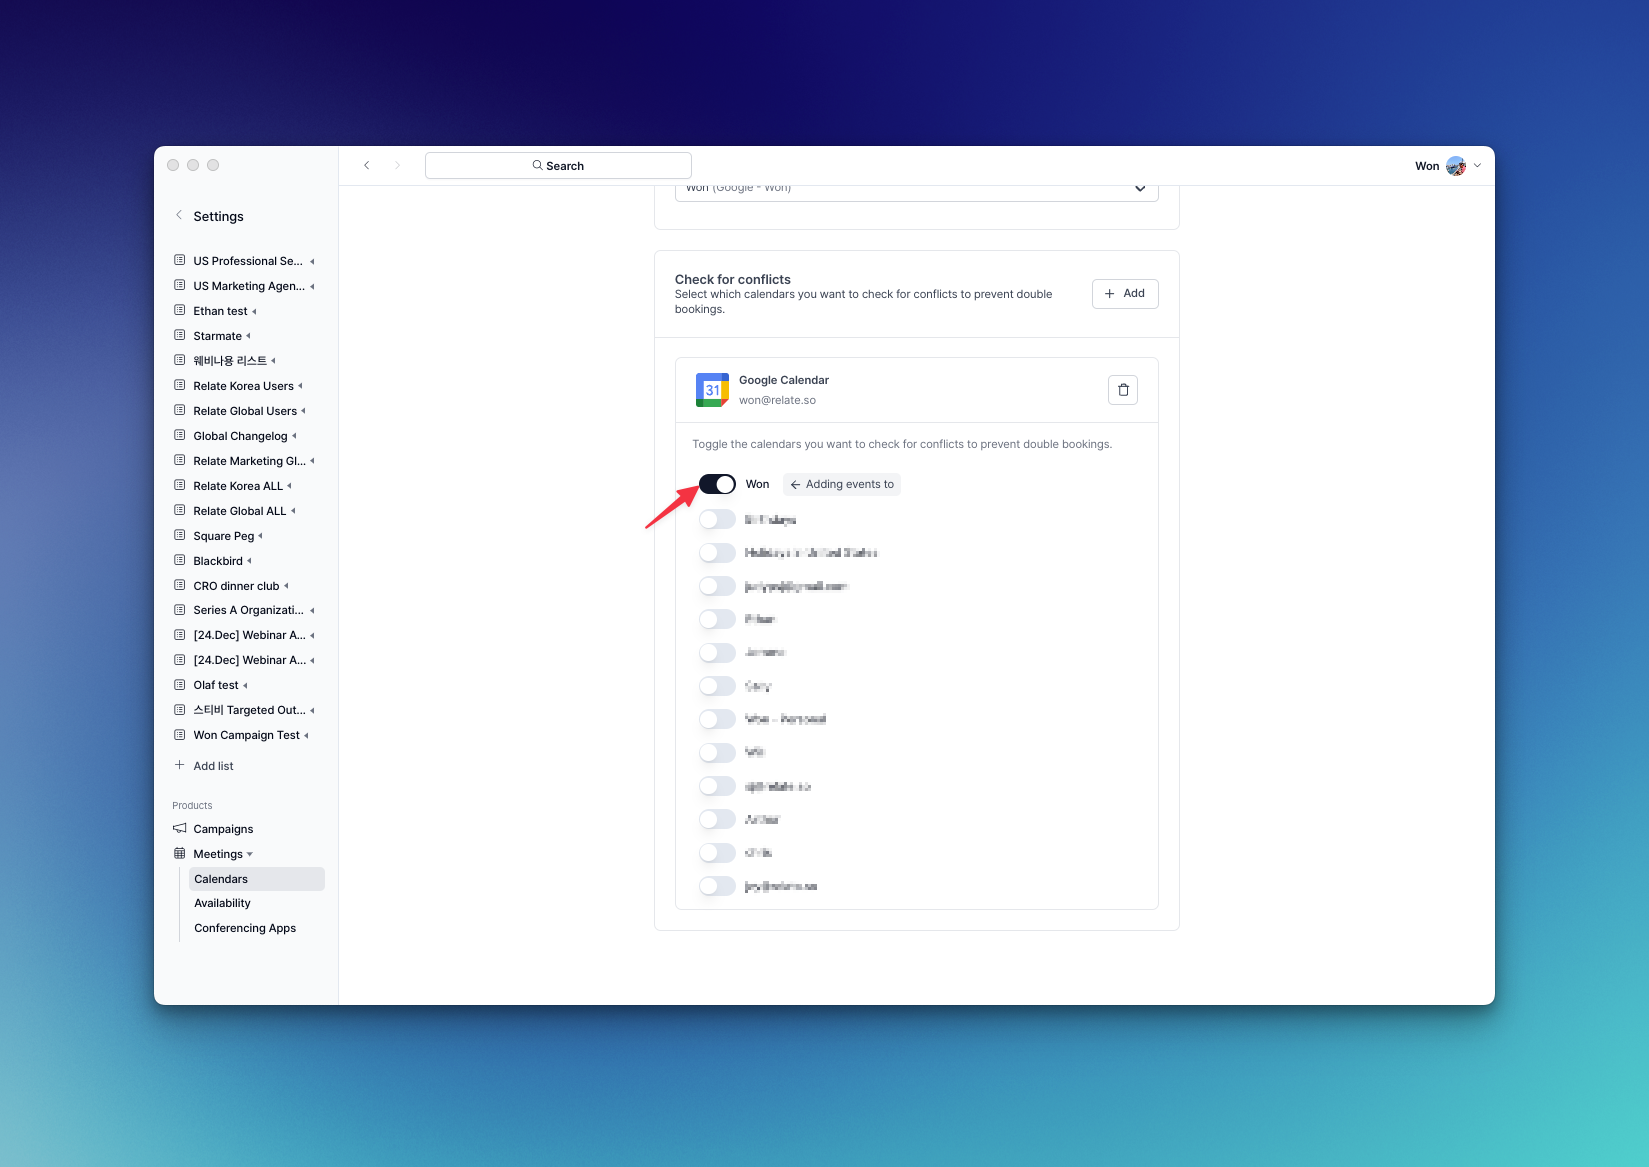
- Click the
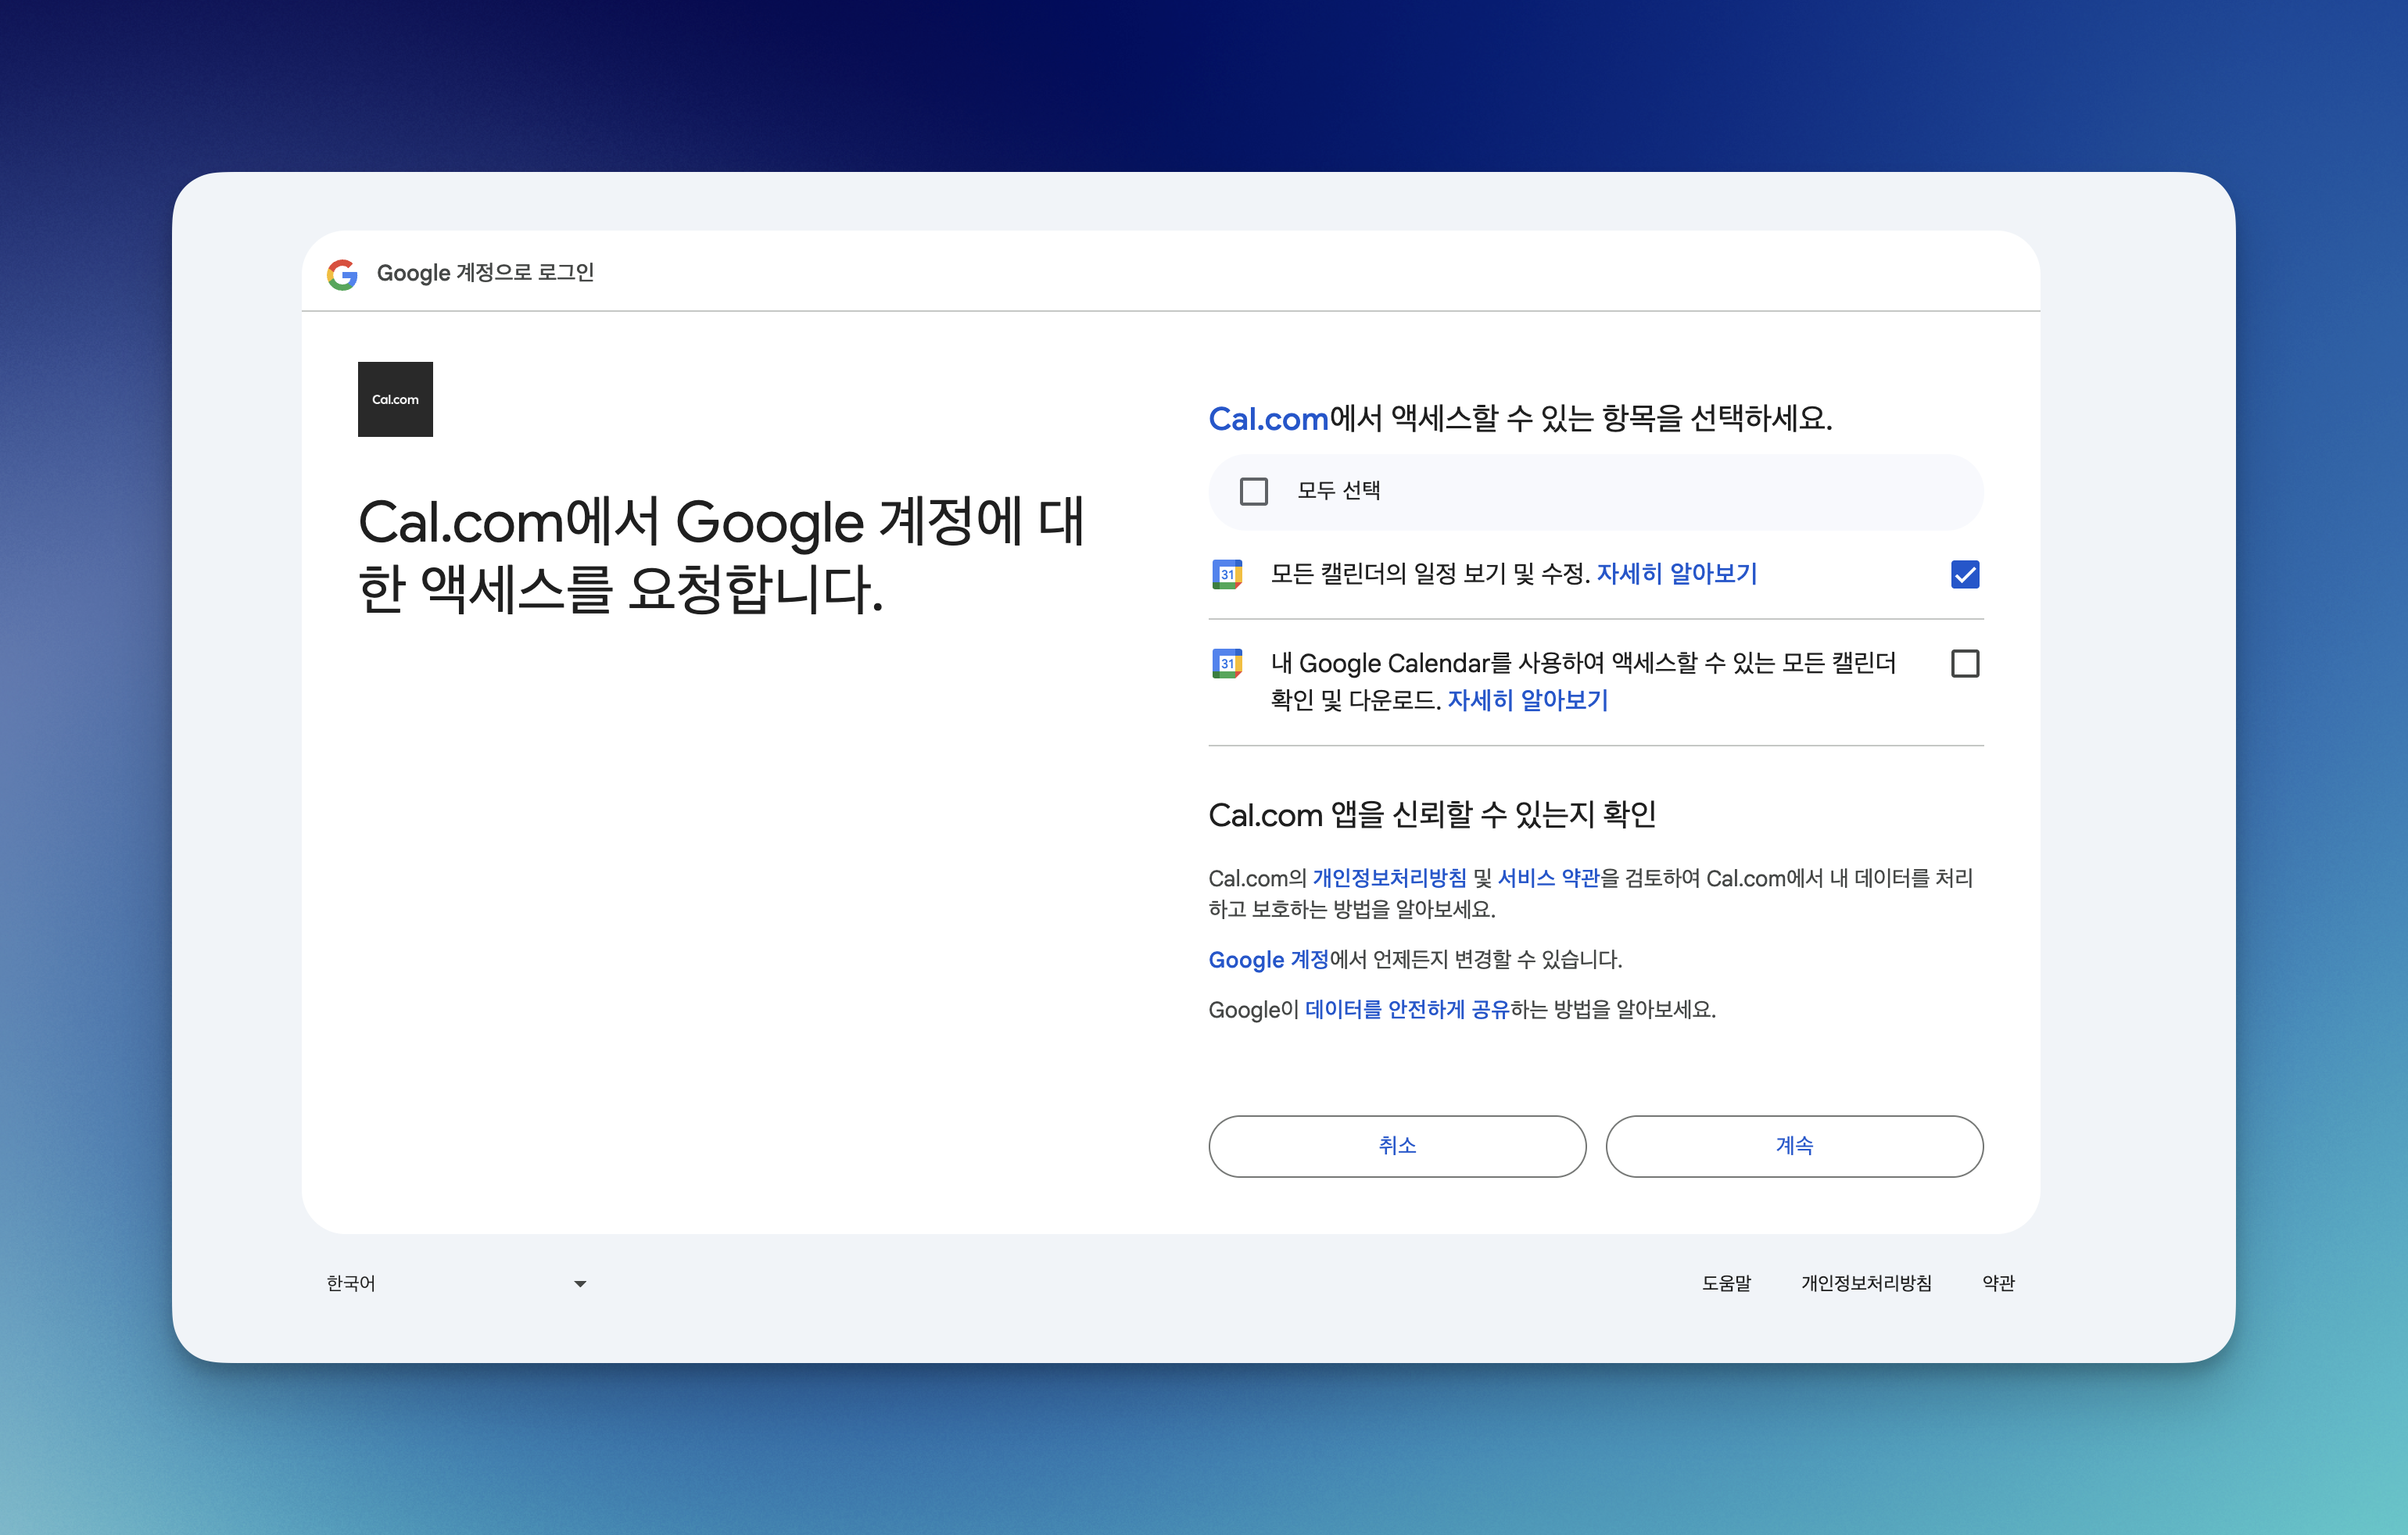
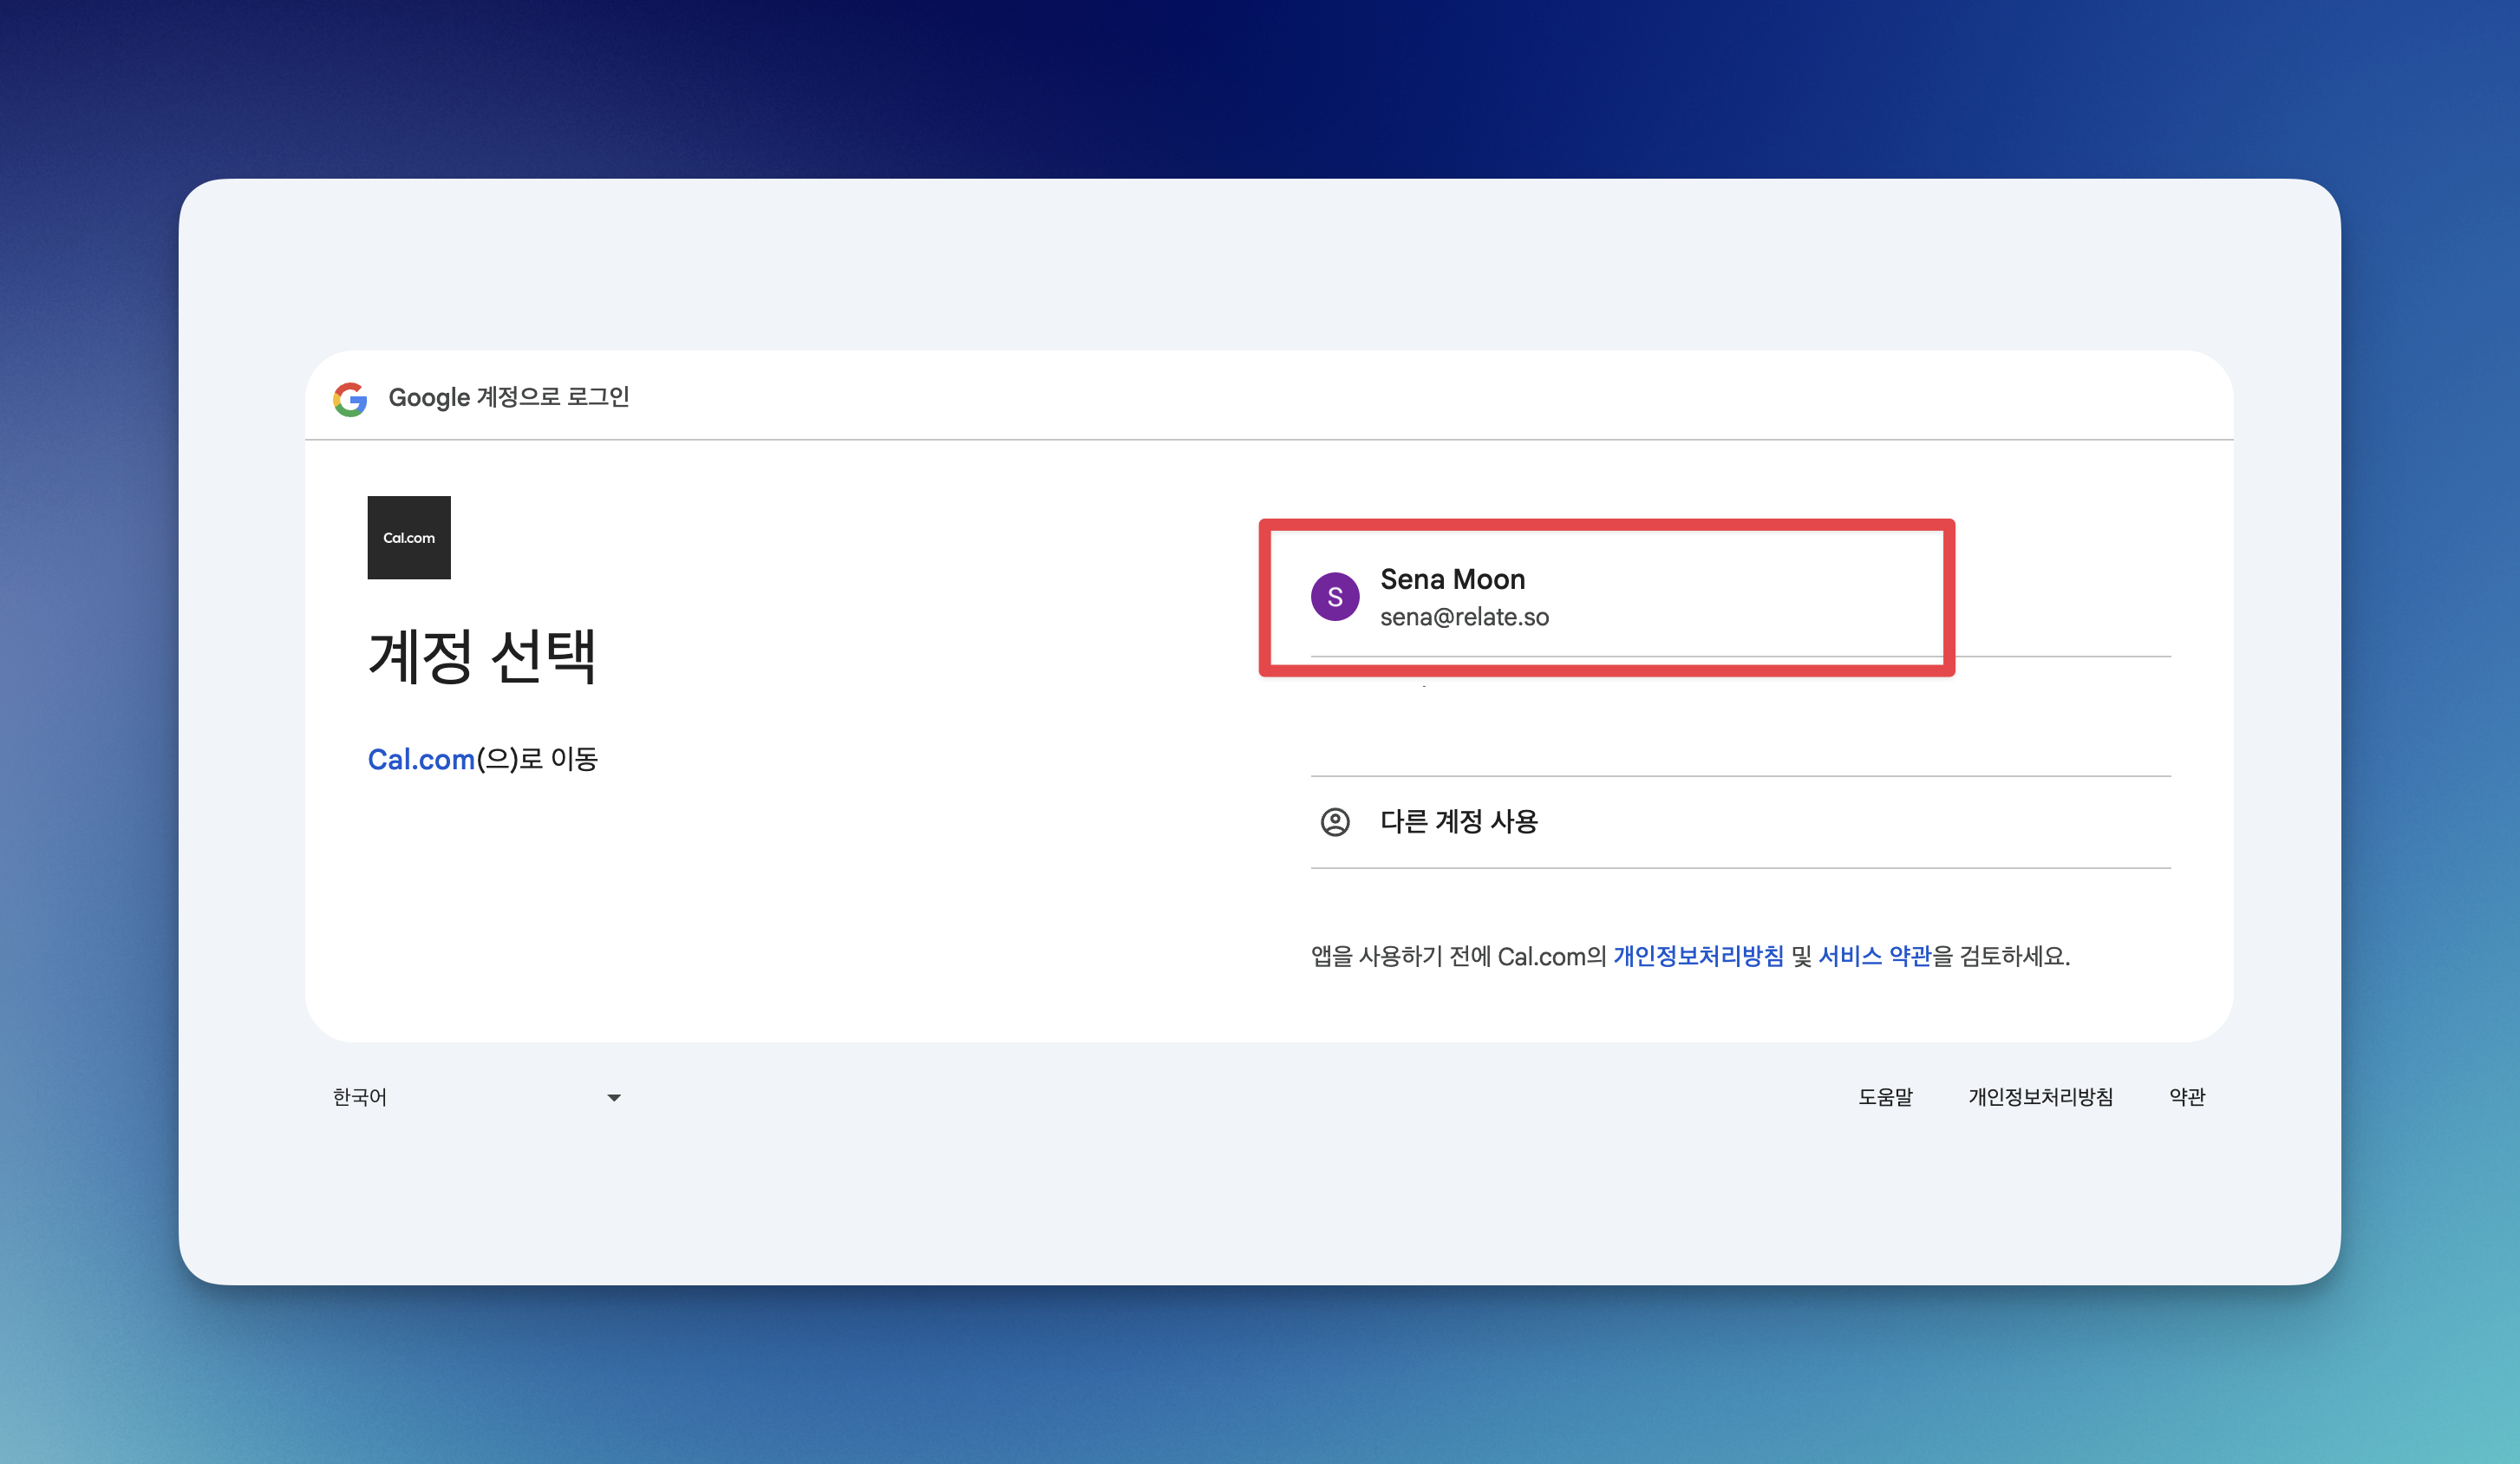
+ Addbutton and select the calendar you wish to integrate (Google, Outlook, Apple, etc.). - Select your calendar account and allow access to Cal.com. Cal.com is a platform that automatically coordinates schedules with external users and is embedded in Relate, so you can use it right away without a separate signup.
2. Default Settings
After connecting your calendar, go to the in-app settings page (cmd + , or ctrl + ,) and go to Meetings in the bottom left corner.2-1. Select Calendar
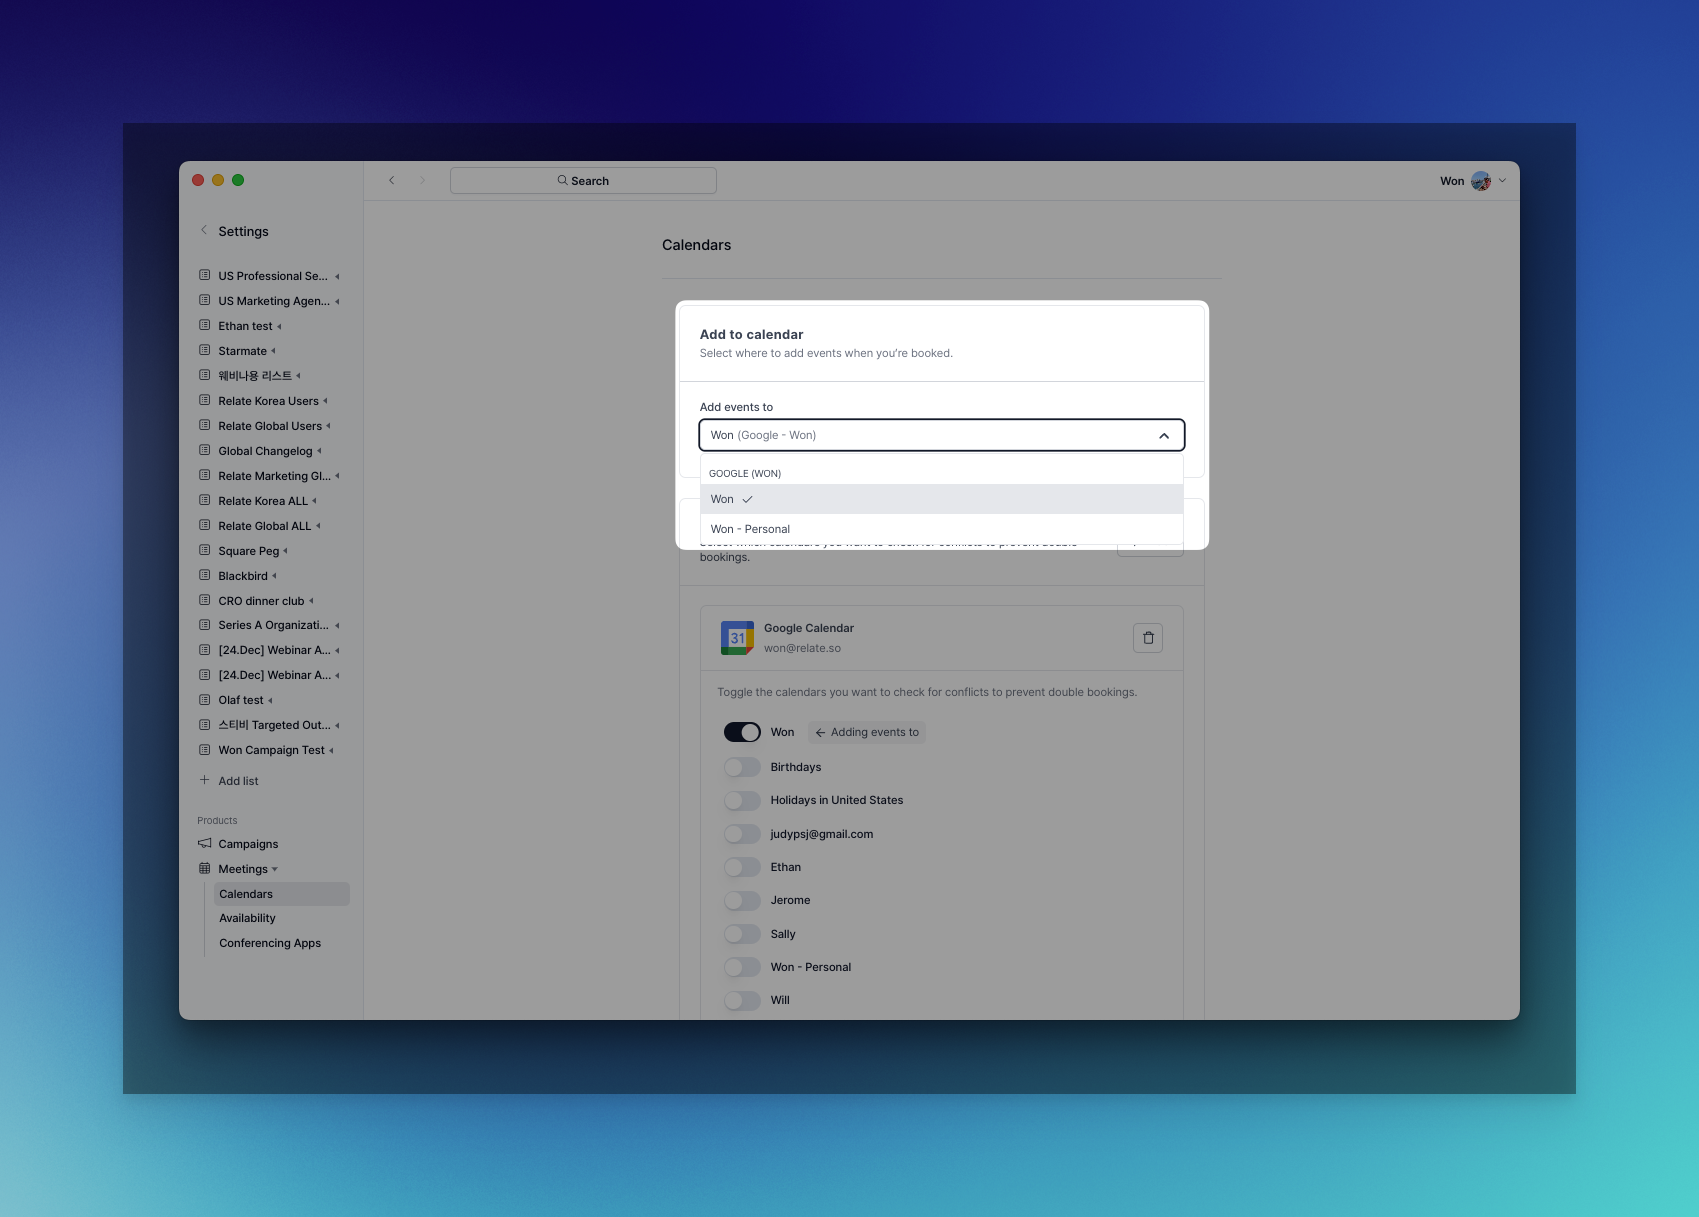
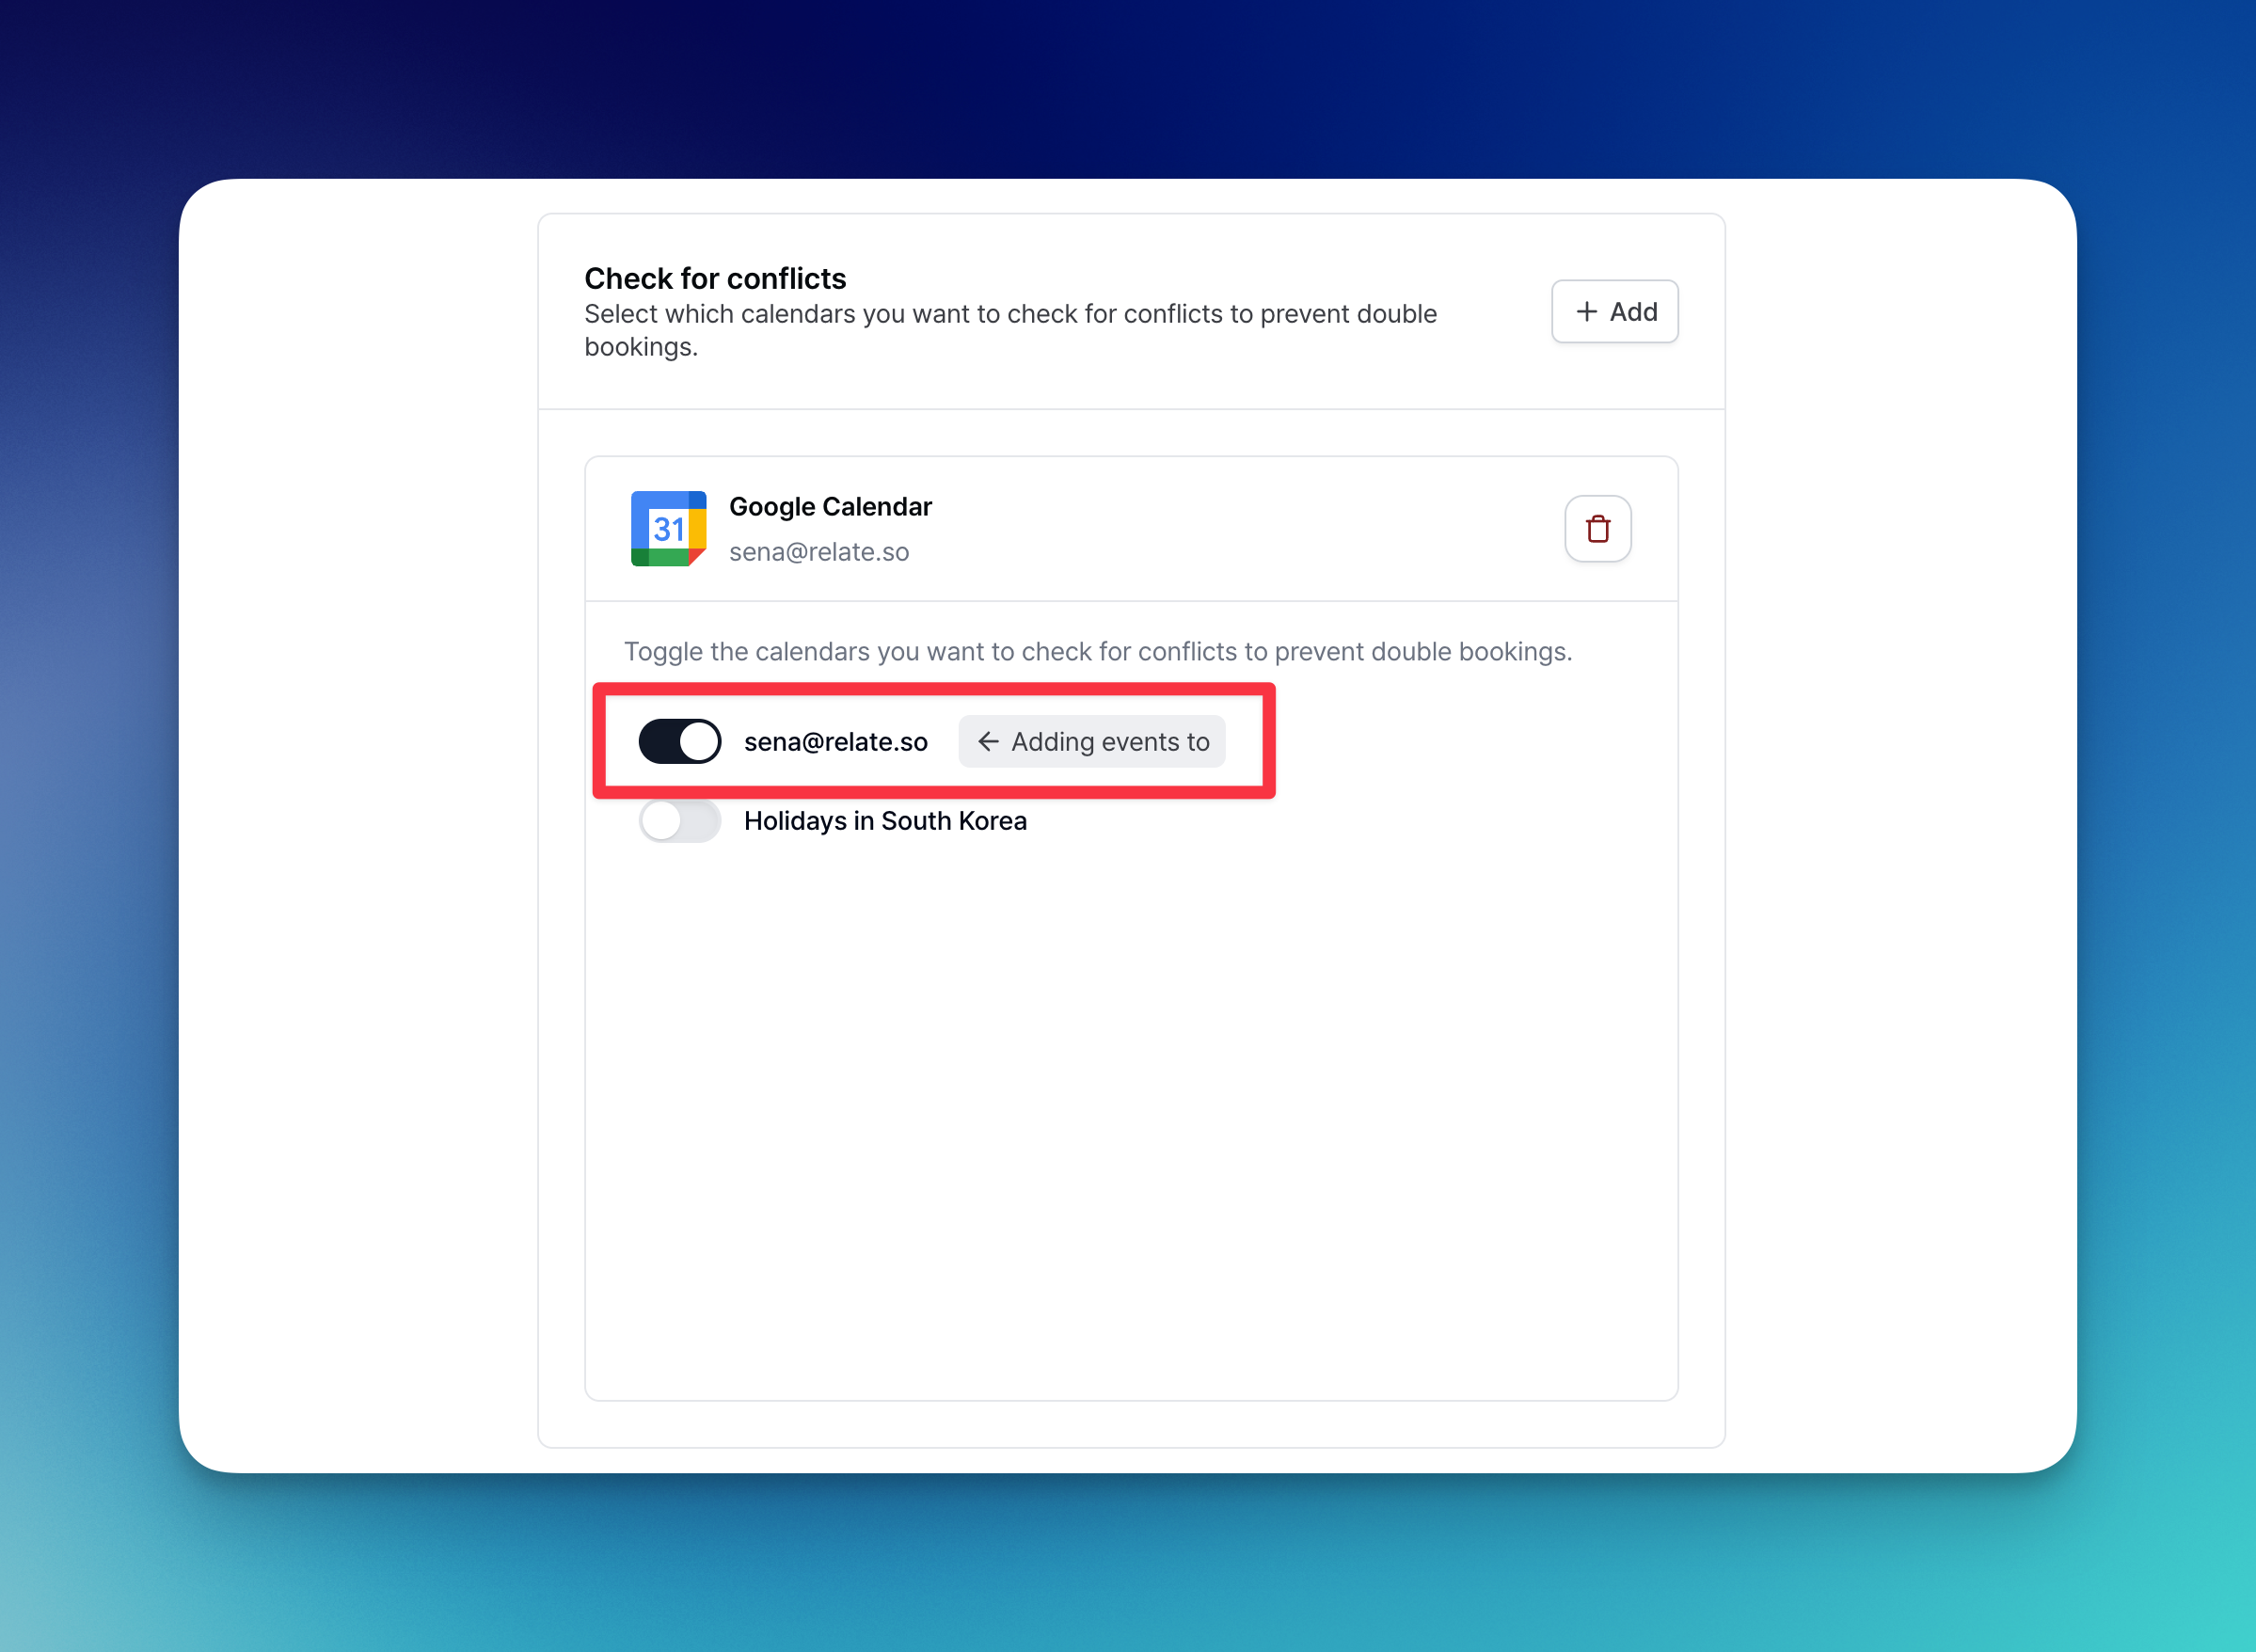
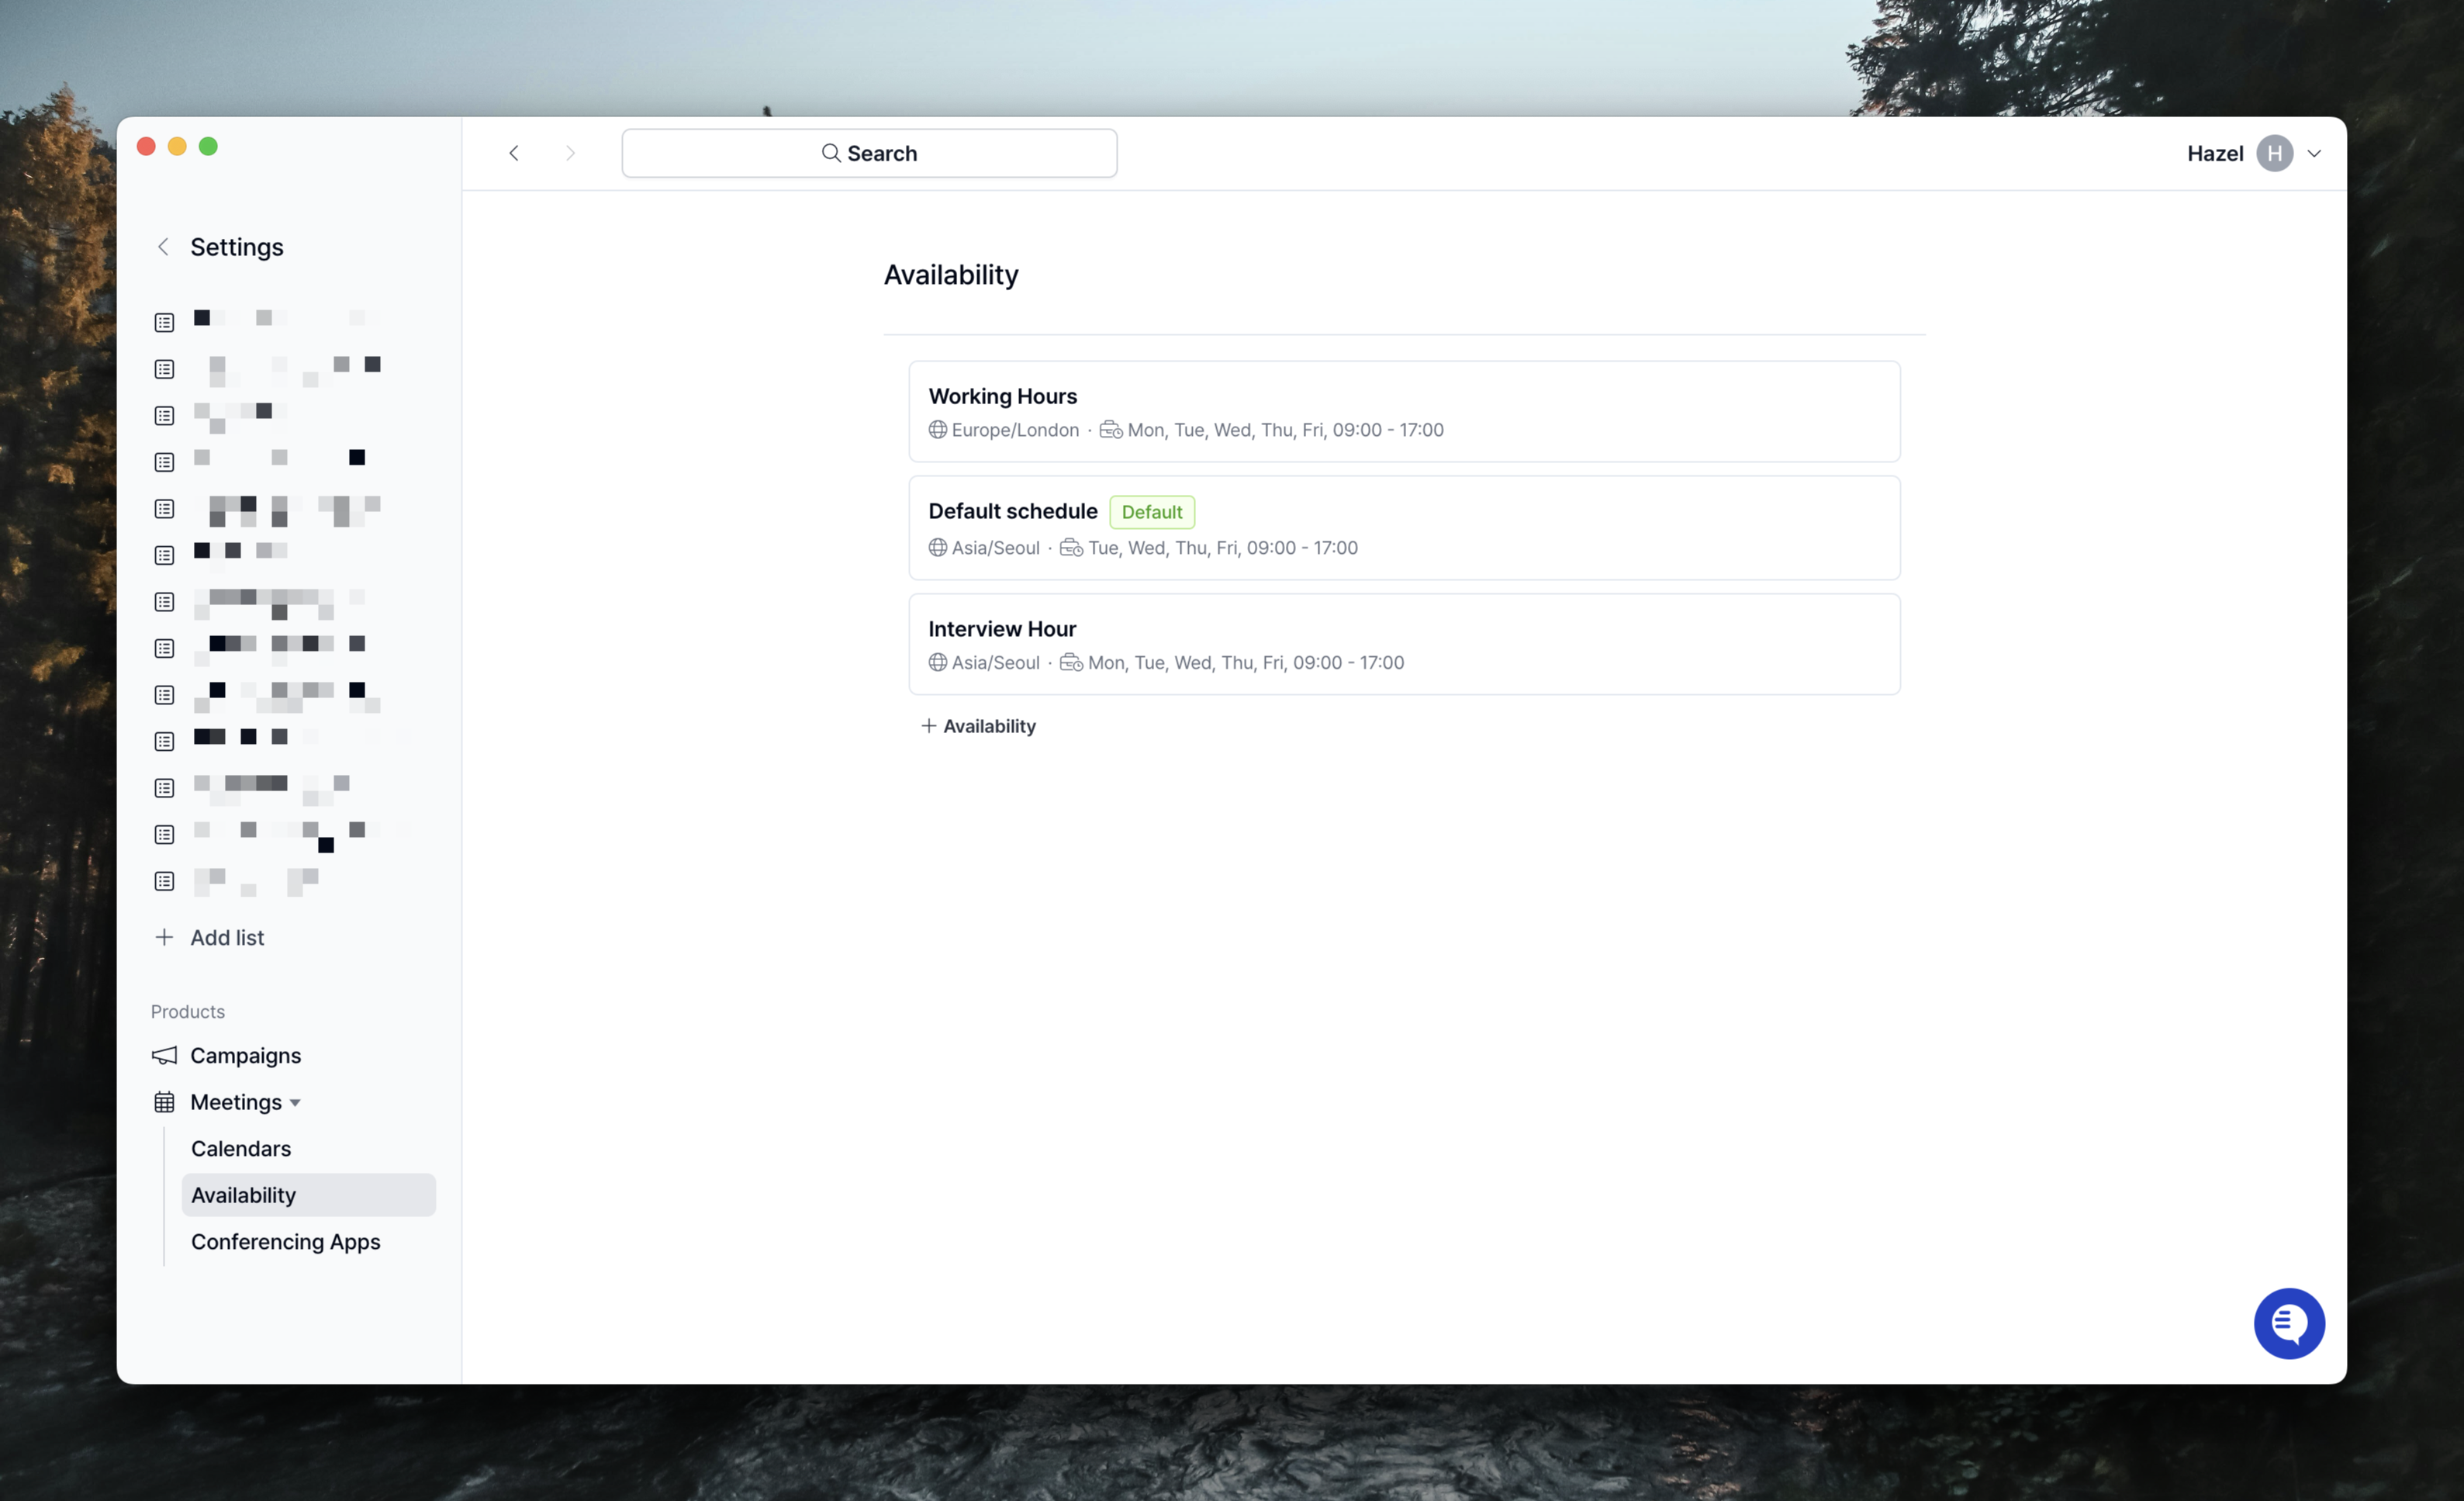
2-2. Manage Availability
Availability is about setting the available time slots for each user (account). To set the available times, press + Availability, then enter a name, and a window will pop up where you can set the times.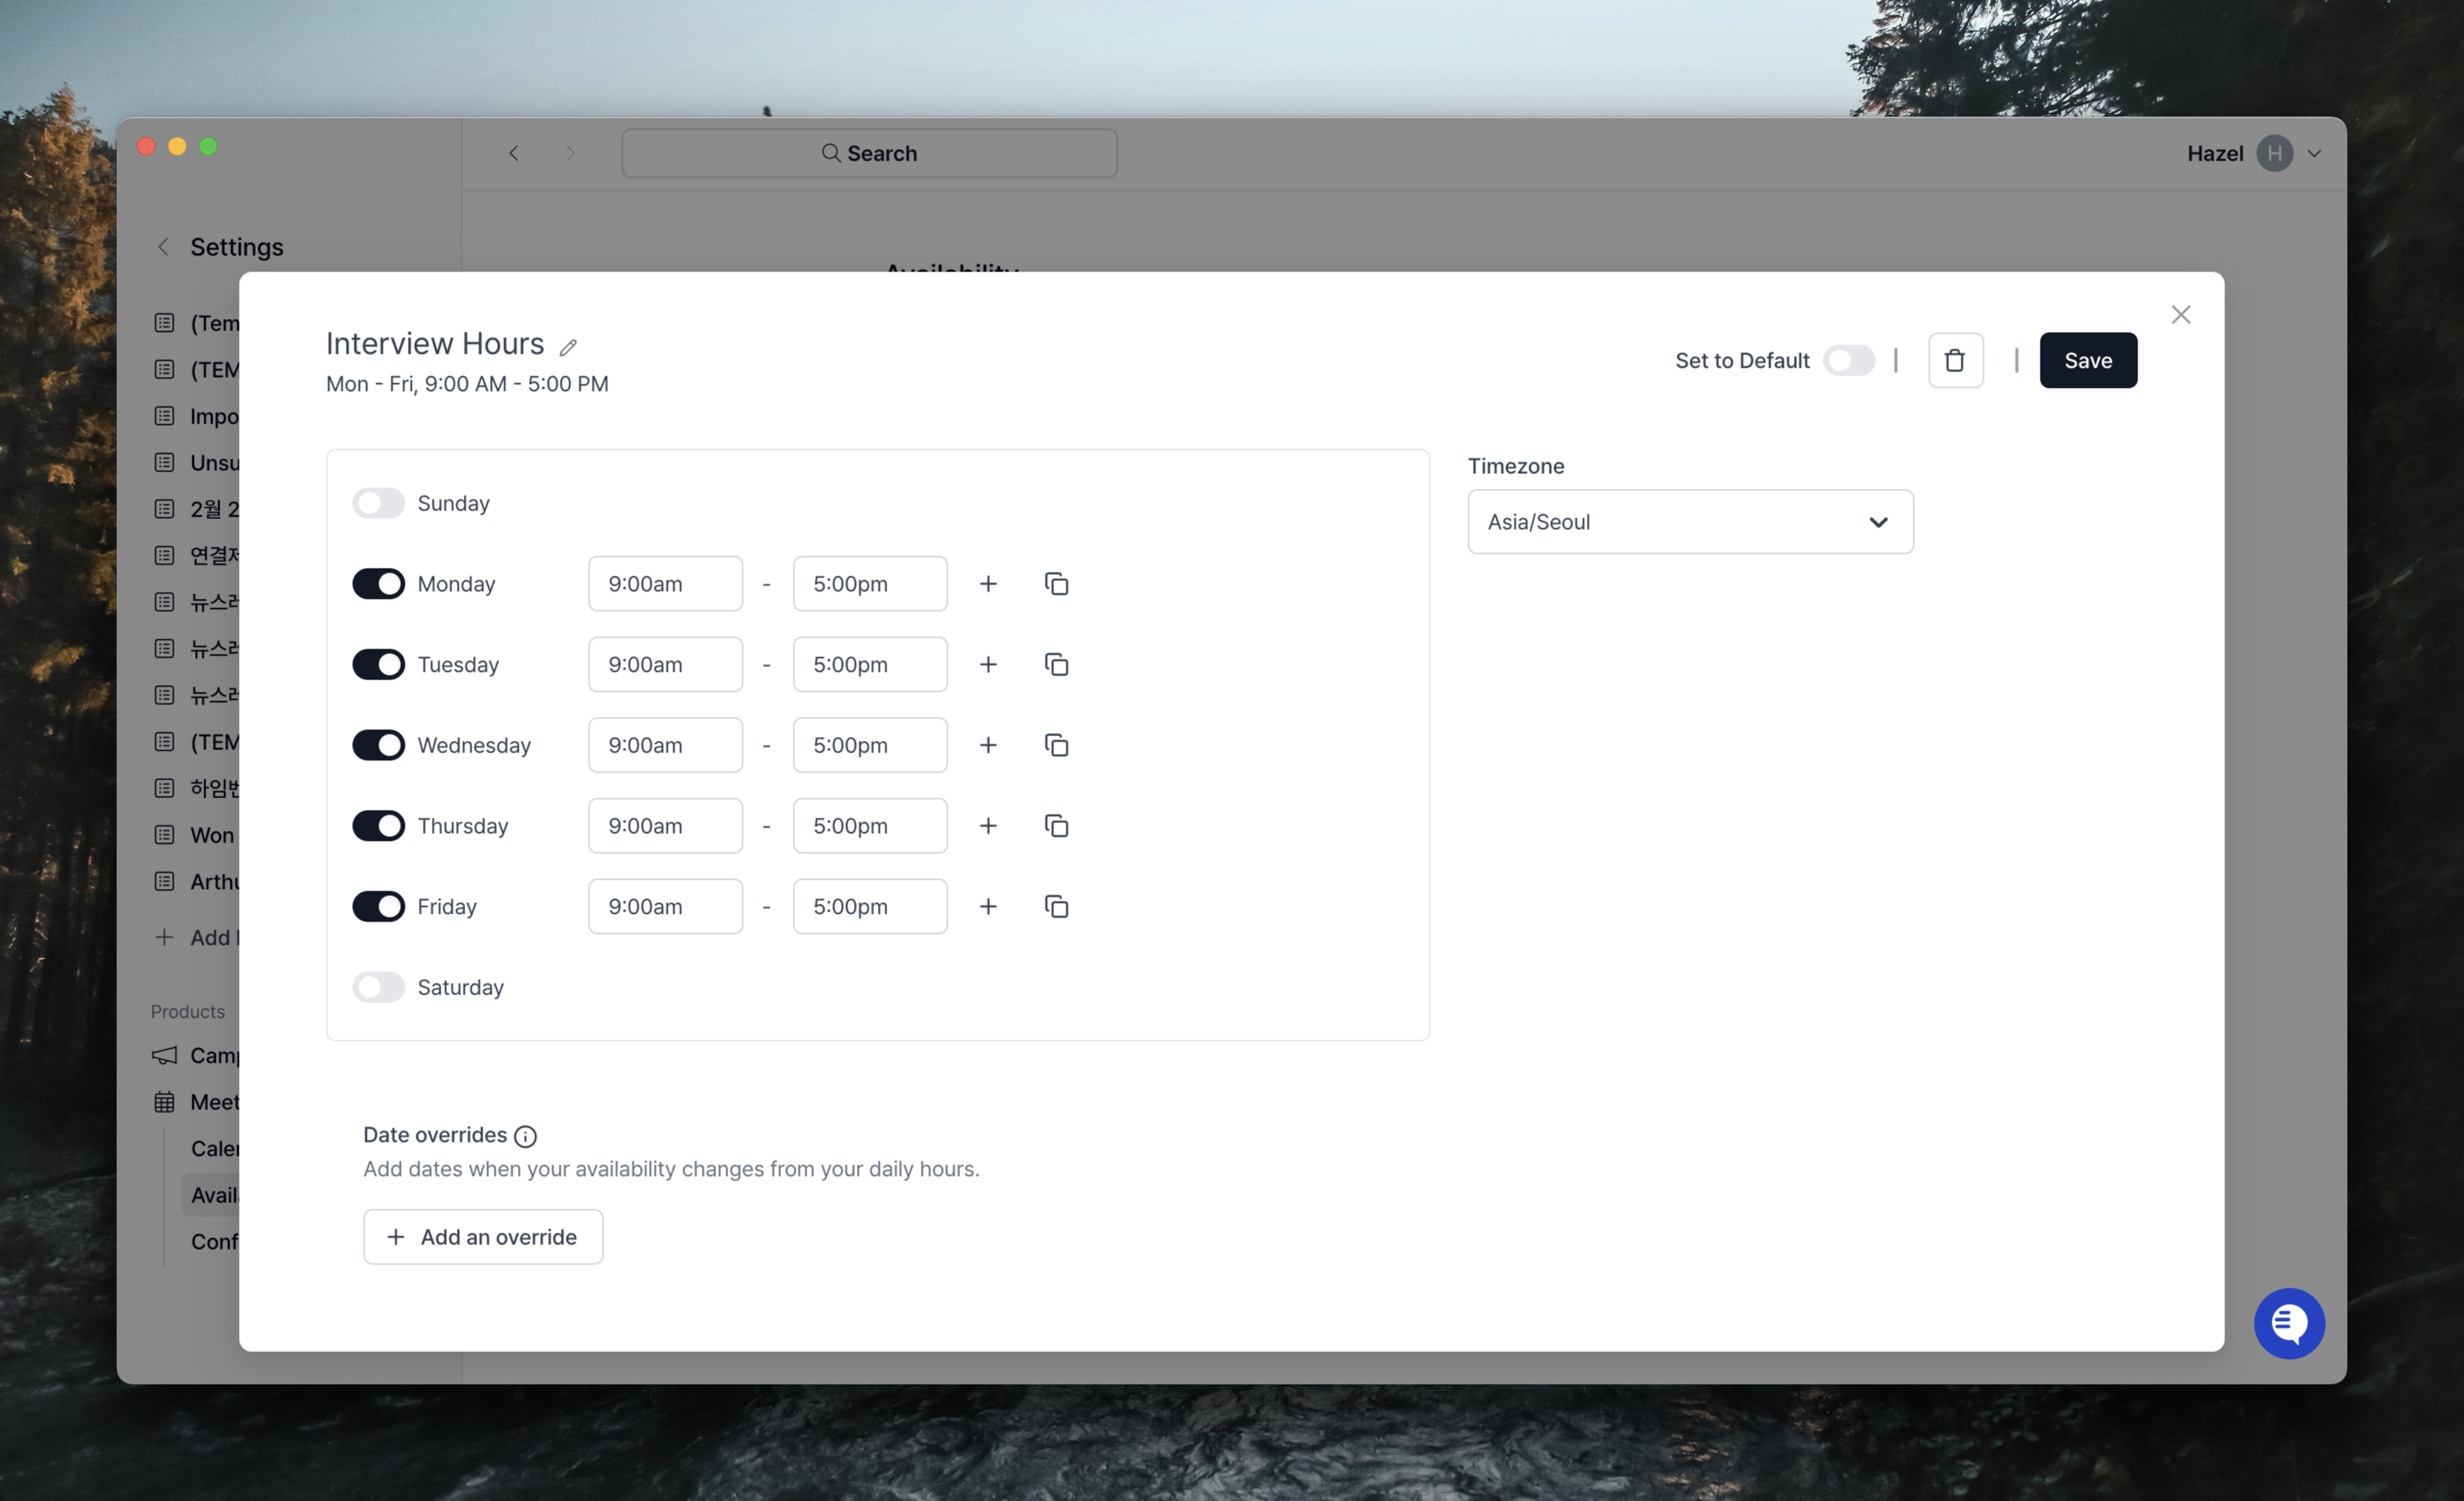
2-3. Configuring Conferencing Apps

Creating a meeting scheduler
Select the Meetings tab on the left side of the Relate menu. Next, click the ’+ Meeting scheduler’ button at the top to open the pop-up window shown below.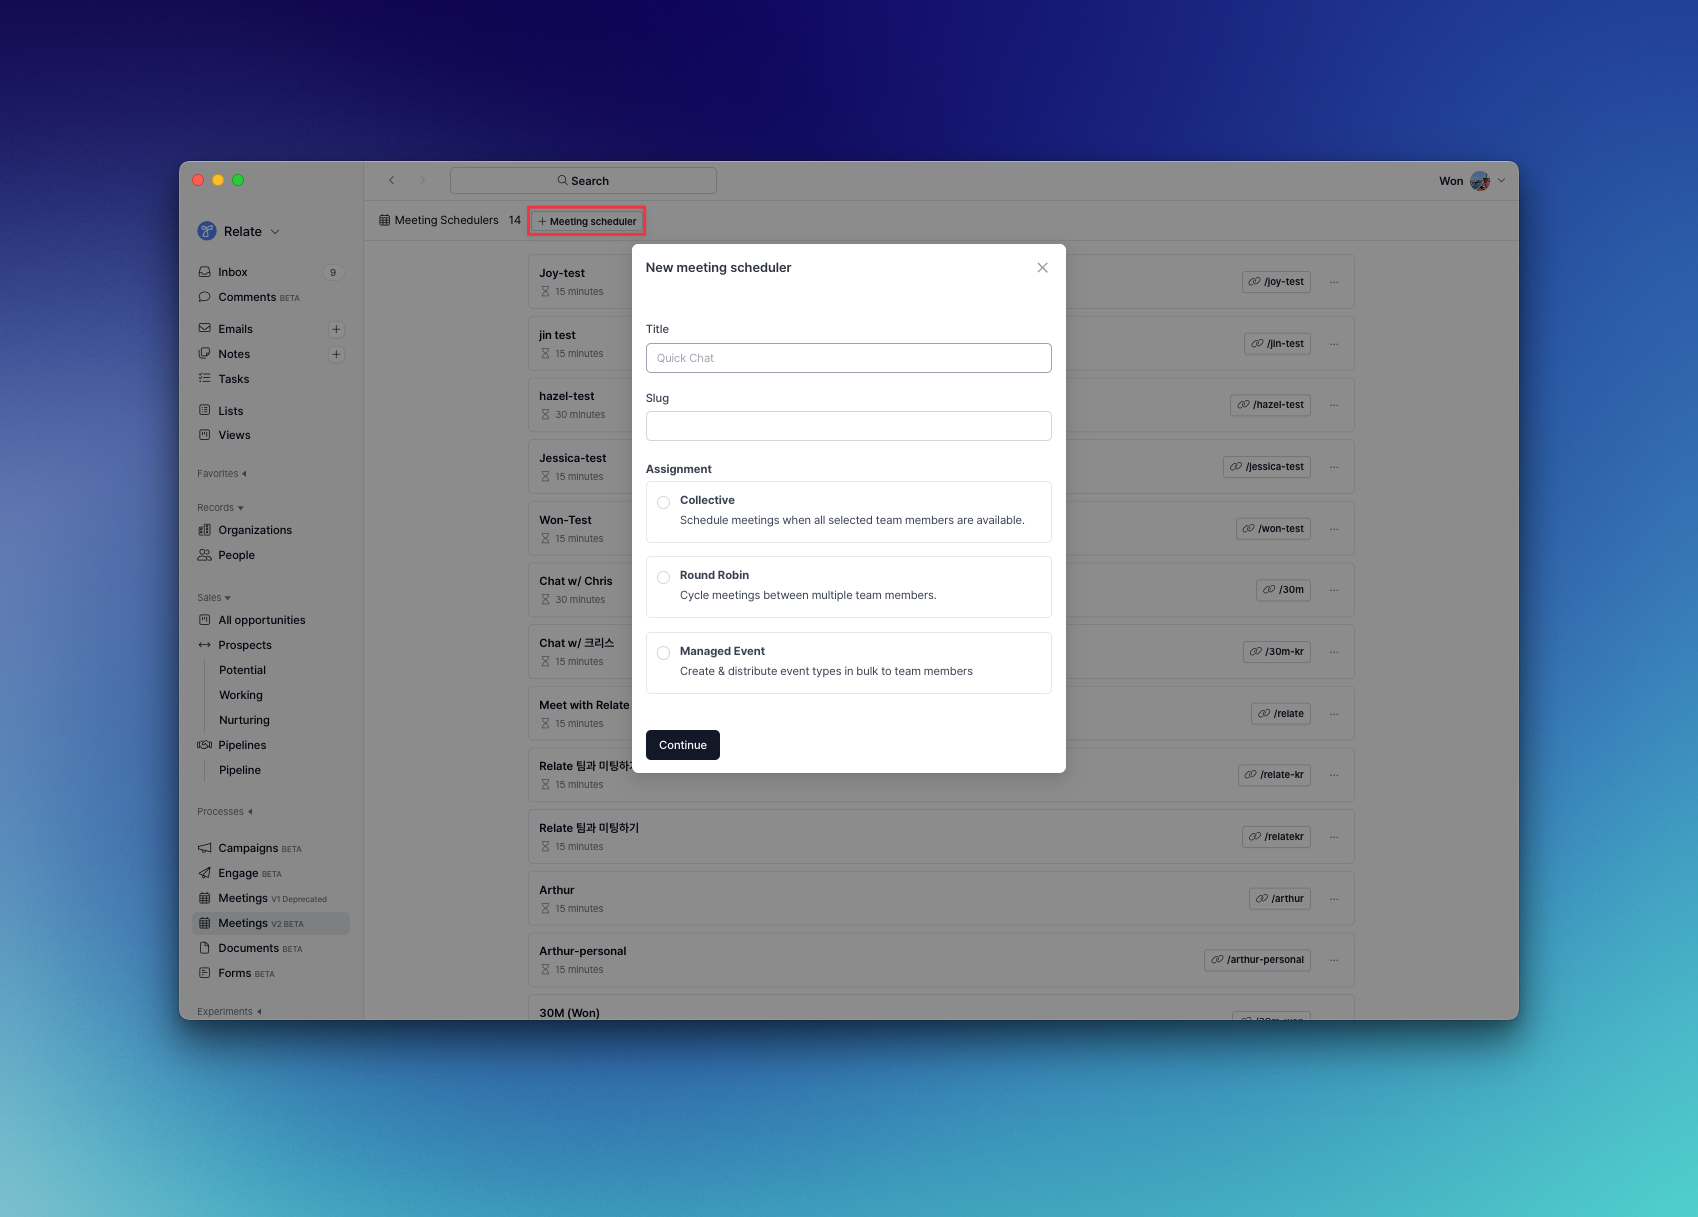
- Collective: Allows all selected hosts to schedule meetings only when they are available at the same time. This is generally used for group calls.
- Round Robin: This calendar rotates between multiple hosts each time a prospect schedules a meeting. Each host can get equal number of meetings, or you can maximize availability.
- Managed Event: This can be used for a personal calendar for 1:1 meetings.
Cautions for selecting a Managed EventIf you created a meeting scheduler with Managed Event, it shows meeting links for all assigned hosts.This is because if another team member copies and shares a link from a Managed Event meeting scheduler created by another team member, it will be an invalid URL.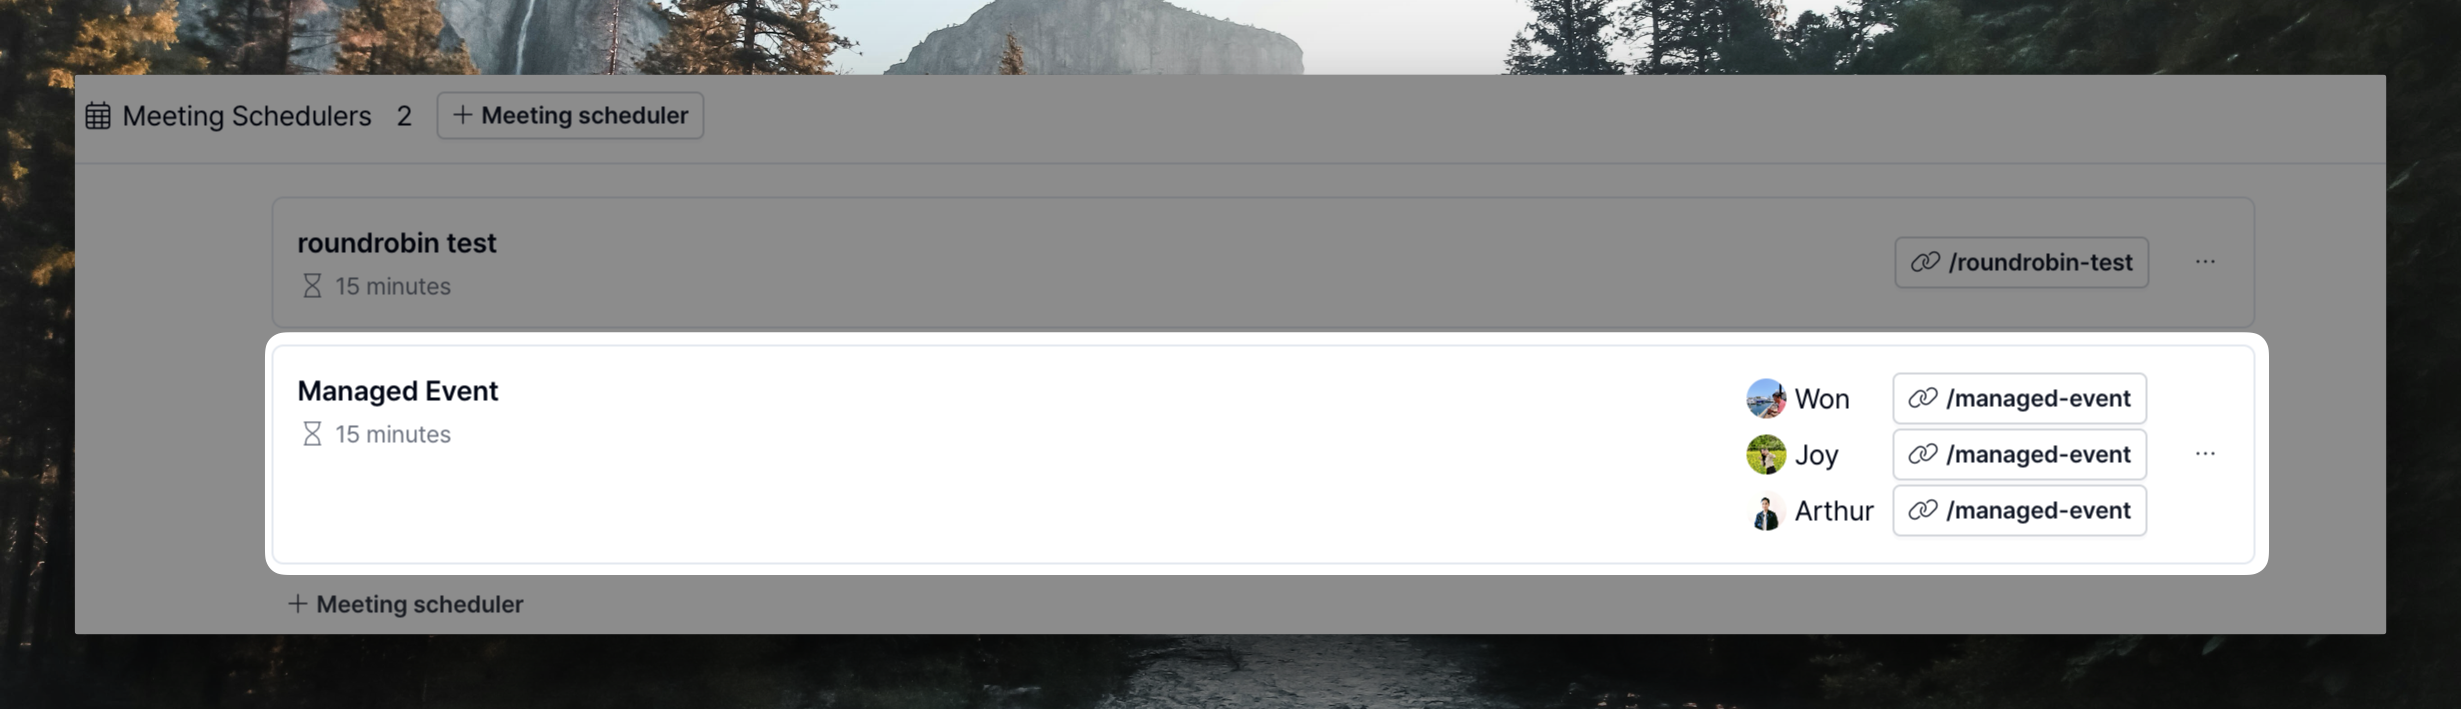
Event Setup
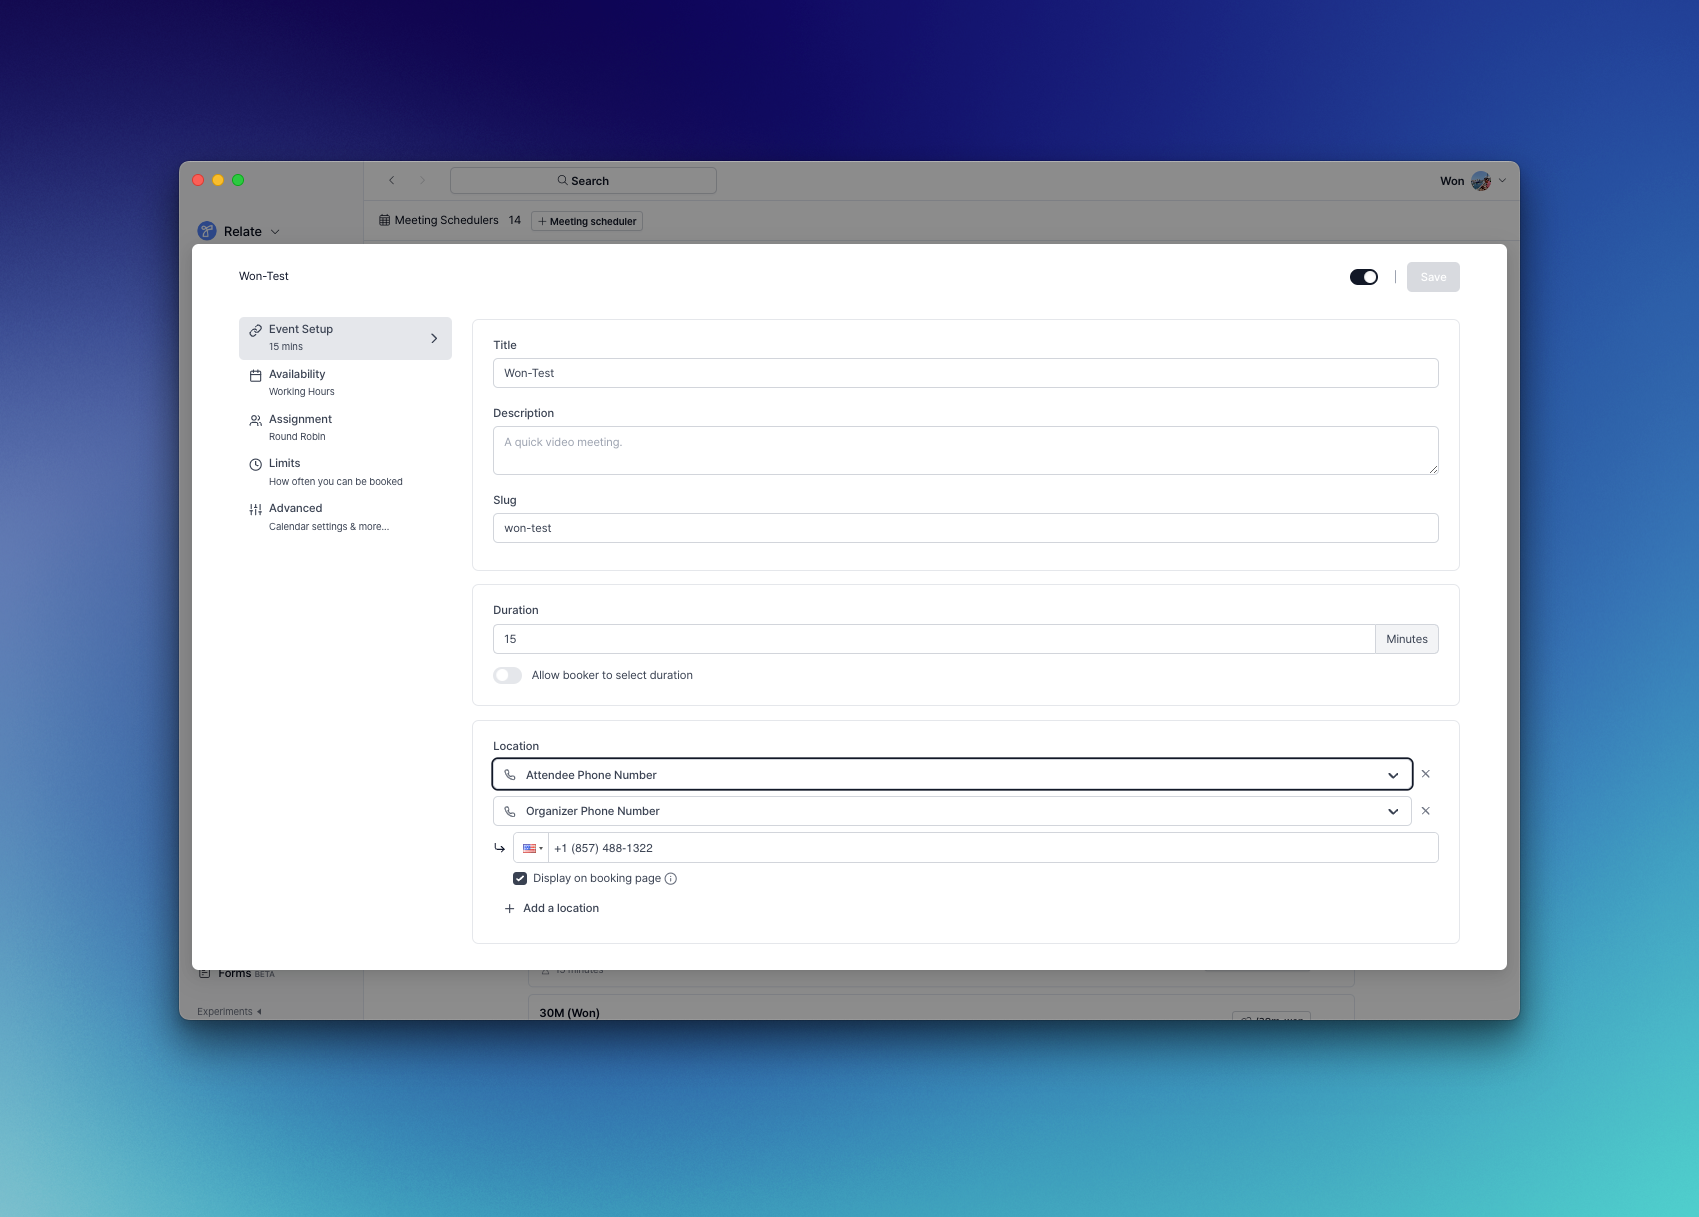
- Set the title, description, and slug of the meeting scheduler
- Meeting duration (You can also allow the person scheduling the meeting to set the meeting duration.)
- Meeting location (Conferencing, in-person, phone, etc.)
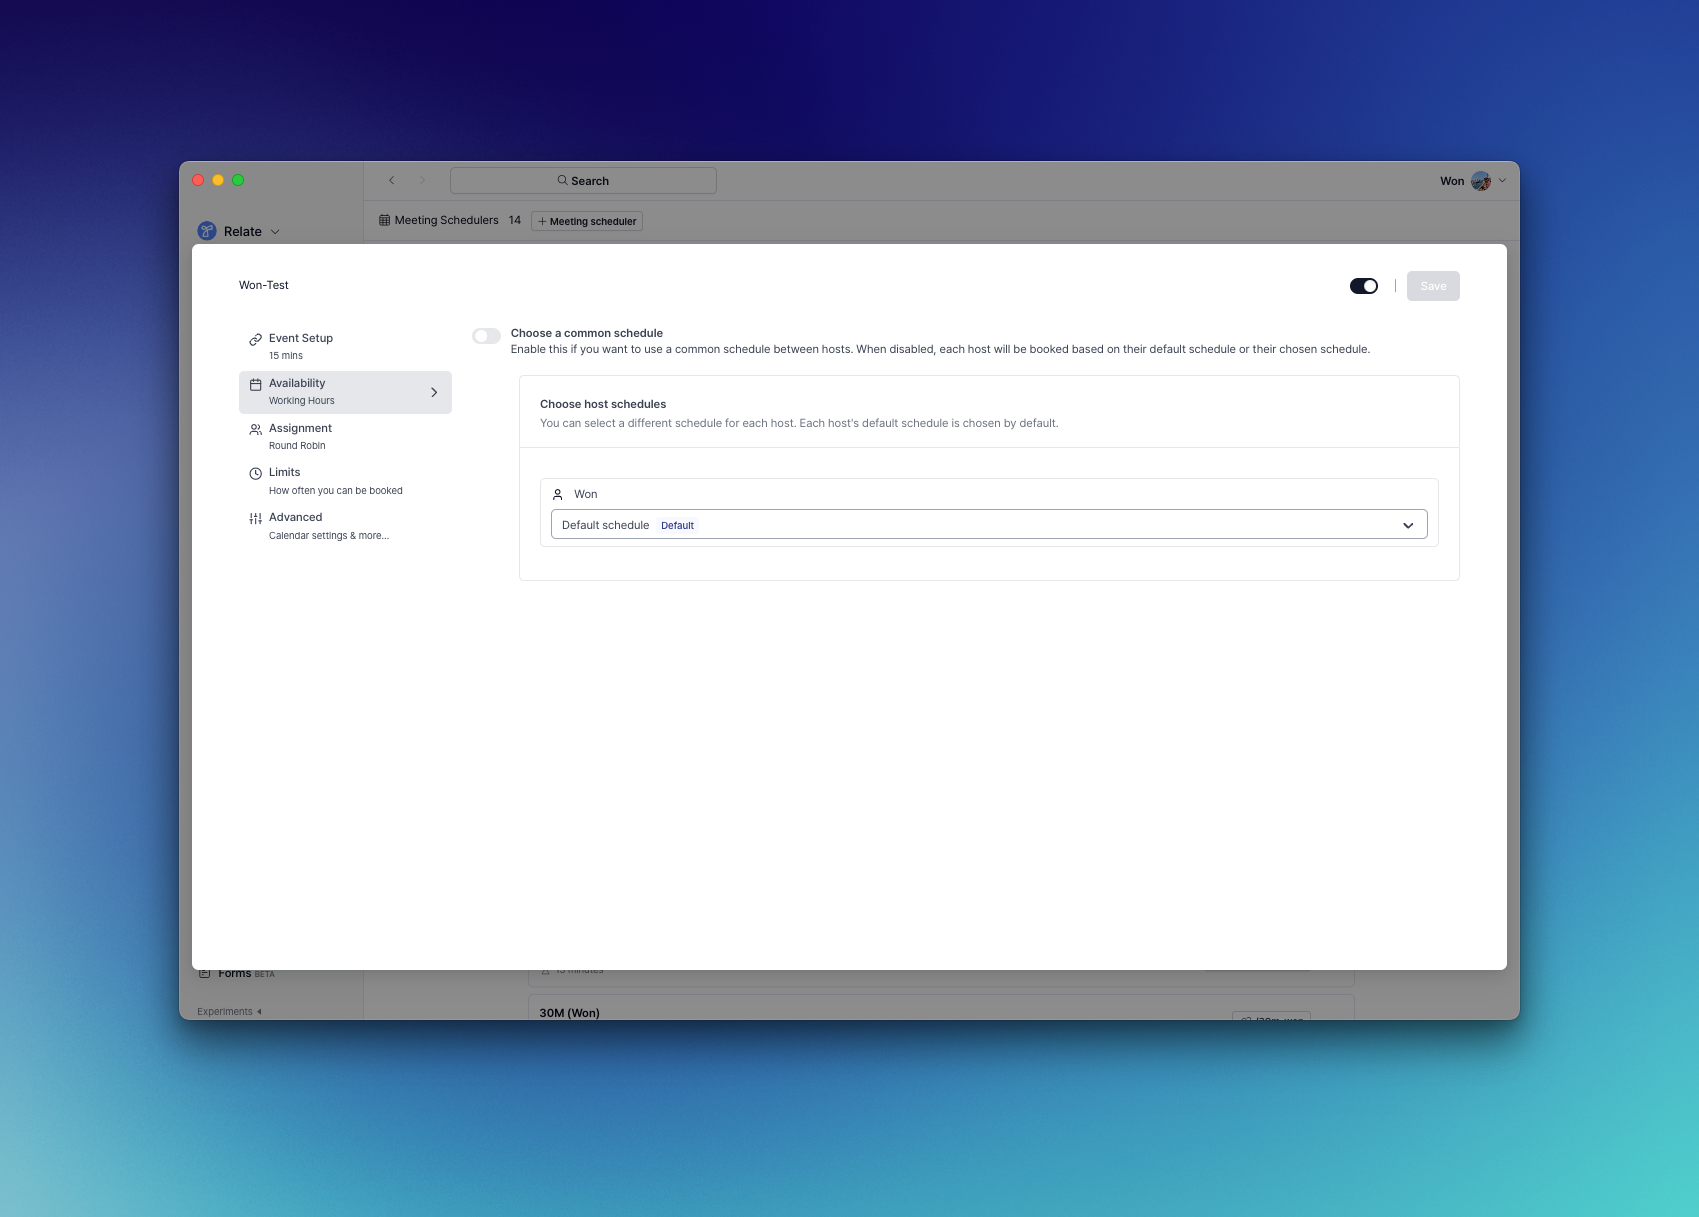
Availability
Assignment

- Distribution: Maximize availability, which provides as many meeting slots as possible, or load balancing, which allocates meeting slots in a fixed ratio.
- Fixed Hosts: Hosts who must participate in all meetings.
- Round-Robin Hosts: Add hosts from your team, then set their priority (the higher the priority, the more meetings they will be scheduled for) and weights (with the same ratio resulting in the same number of meetings).
Limits
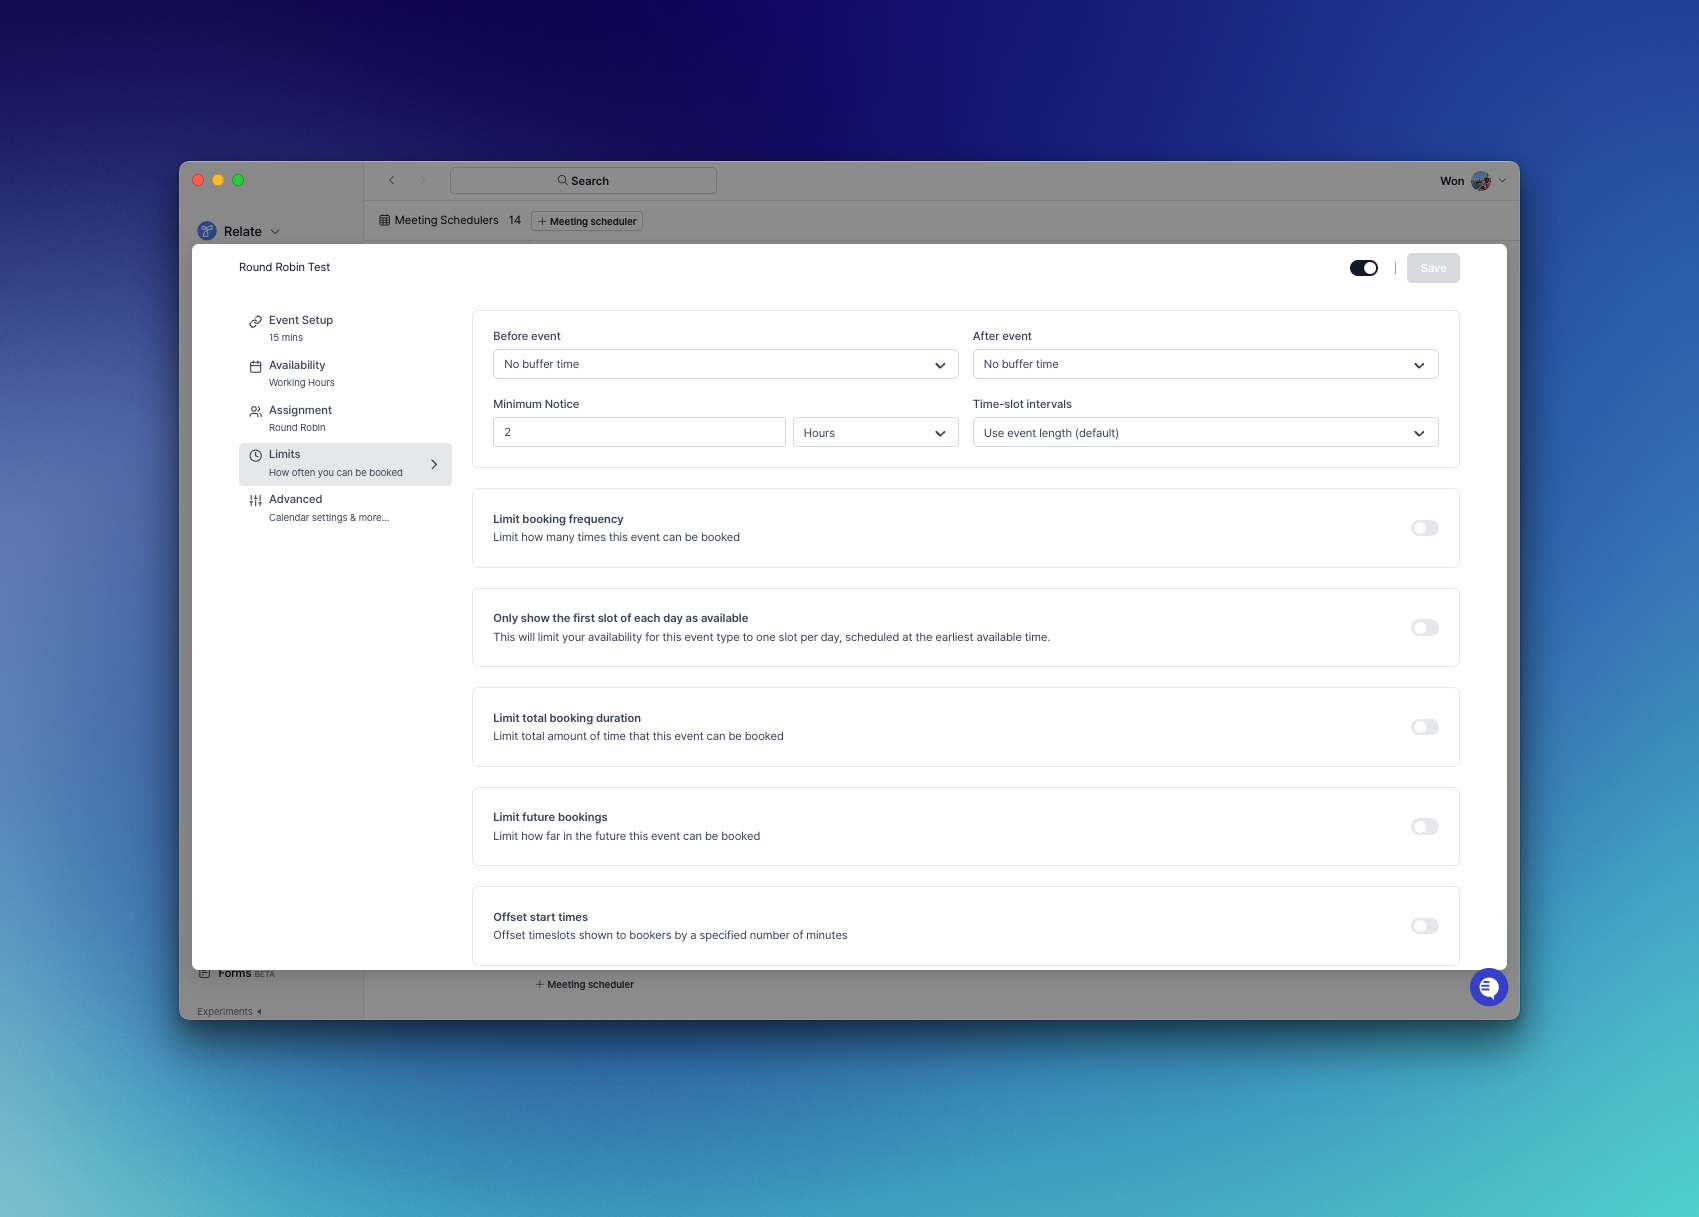
- Buffer time before and after meetings
- Minimum notice
- Time-slot intervals
- Limit booking frequency
- Only show the first slot of each day as available
- Limit total booking duration
- Limit future bookings
- Offset start times
Advanced
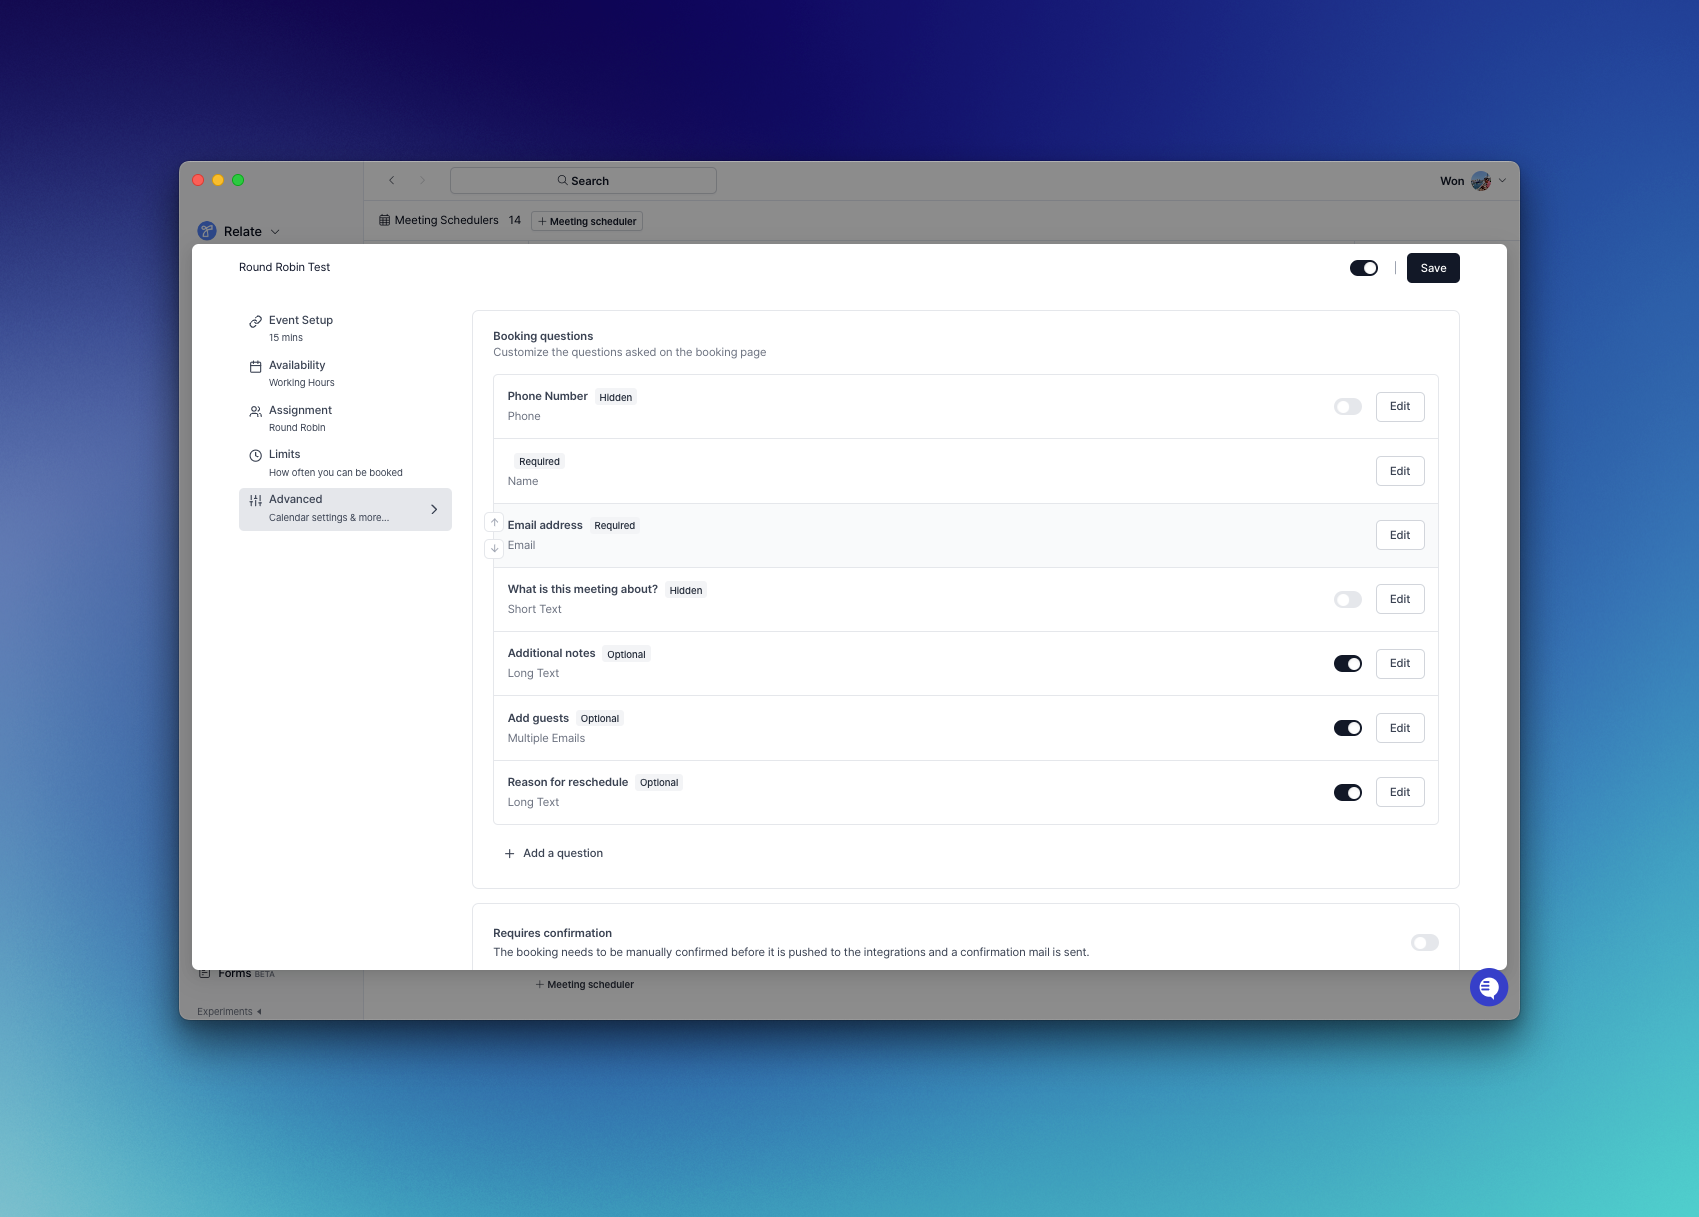
Prefilling the booking link
Append query parameters to your booking link to open the booking form with fields already filled in. This is handy when you embed the link in an outbound email or sequence with merge tags, so each recipient gets a link pre-filled with their email, name, and more. Example:
Beyond these built-in fields, any input you add under Advanced (booking questions) can also be prefilled by using that field’s identifier as the parameter. For example, if you added a field with the identifier
company, pass ?company=Relate.
Values containing spaces, non-ASCII characters, or
@ may need to be URL-encoded.